
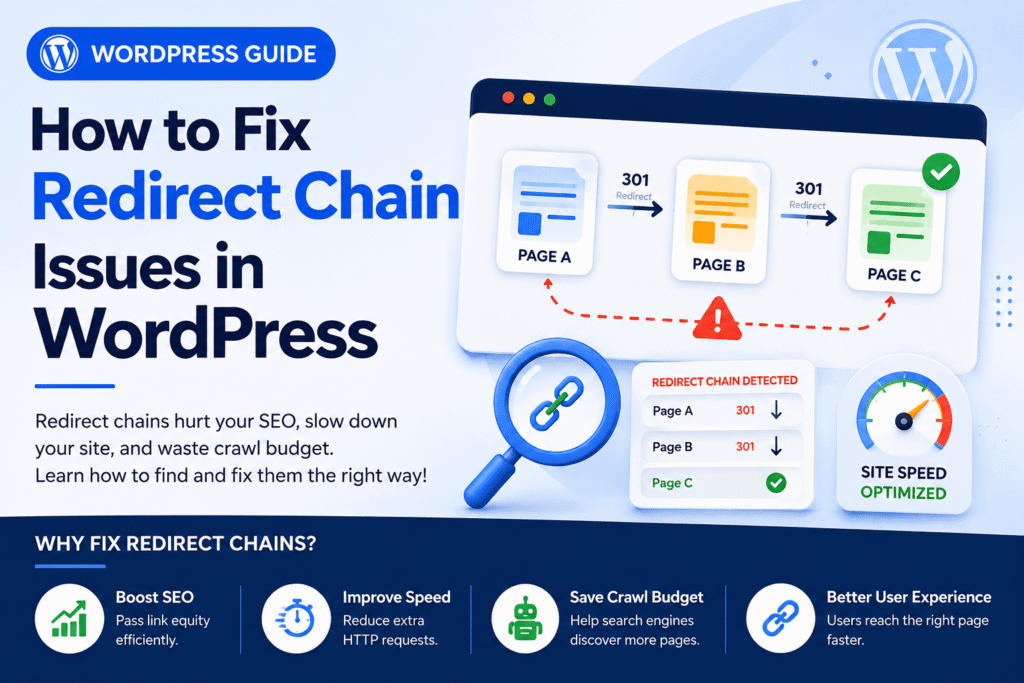
A redirect chain happens when a link bounces multiple times before reaching its final URL. For example, Page A sends users to Page B, which then sends them to Page C. Learning how to fix redirect chain errors is essential for clean site architecture.
Every extra hop forces the browser to make a new HTTP request. This adds unnecessary delay and slows down page loading speeds. Search engine bots also struggle with these long chains. Googlebot allocates a limited crawl budget to your site. When bots spend crawl budget on repeated hops, they may leave before discovering new pages. Redirect chains can also dilute link equity across multiple jumps.
To maintain rankings and site speed, you must locate every jump and map Page A directly to Page C.
How to Find Redirect Chains Using Free Tools
You cannot easily spot redirect chains just by clicking links in a browser. The jumps happen in fractions of a second behind the scenes. Developers use automated scanners to trace full redirect paths.
Using a dedicated redirect chain checker tool makes this detection process straightforward. Desktop crawlers like Screaming Frog scan your entire site and export every redirect path. You can also use browser extensions or online HTTP status checkers for single URLs. These tools show the exact status code of each hop, such as 301, 302, or 307.
Finding these paths helps you address underlying technical seo redirect issues before they harm search rankings. A full audit reveals outdated internal links, old domain migrations, and HTTP-to-HTTPS misconfigurations. Fixing these issues reduces server strain and prevents slow page responses.
redirect chain in wordpress
WordPress makes URL management simple, but plugin automation often creates hidden redirect paths. When you change a post slug, SEO plugins like Rank Math or Redirection automatically generate a 301 redirect. If you change that same URL again months later, the plugin adds another rule on top of the old one.
This creates an unwanted redirect chain in wordpress without your knowledge. Old internal links on your blog posts then point to the first URL, hop to the second, and finally land on the third.
You can resolve this directly within your WordPress dashboard:
- Open your WordPress admin panel and go to your redirection manager (e.g., Rank Math > Redirections, or Tools > Redirection).
- Search for the initial source URL (Page A) and locate its corresponding destination rule.
- Check if the target URL (Page B) is itself set to redirect to another URL (Page C).
- Edit the source rule so that Page A points directly to Page C.
- Delete any unnecessary intermediate redirect rules that are no longer in use.
- Update old internal links inside your posts so they point straight to Page C.
Updating your internal links directly inside the WordPress block editor removes the need for the browser to trigger a redirect at all.
The Core Manual Fix: .htaccess and Server Rules
For sites running on Apache or LiteSpeed servers, redirect rules often sit inside the .htaccess file. Over time, manual edits and plugin installations cause these rules to pile up. If you stack multiple redirect directives over several years, the server processes them in sequence.
When planning how to fix redirect chain problems at the server level, inspect the .htaccess file directly. You can access this file via cPanel File Manager or FTP.
A proper 301 redirect chain fix replaces multiple jump commands with a single directive. For example, instead of keeping:
Apache
Redirect 301 /old-page/ /middle-page/
Redirect 301 /middle-page/ /final-page/
Rewrite the rules into one direct instruction:
Apache
Redirect 301 /old-page/ /final-page/
Redirect 301 /middle-page/ /final-page/
Always place global rules, such as HTTPS enforcement and non-www to www canonicalization, at the top of the file. Grouping your rules logically ensures the server resolves URLs on the very first request. Knowing how to fix redirect chain bloat in your server configuration keeps response times low and prevents server timeout errors.
Post-Fix Validation and Best Practices
Once you update your redirection rules, you must verify that the chain is completely broken. Start by clearing all layers of caching, including your WordPress caching plugin, LiteSpeed cache, and Cloudflare CDN.
Next, run the original URL through your scanner tool to confirm it returns a clean 301 -> 200 OK response. Check Google Search Console over the next few days to monitor crawl stats and verify that the updated URLs index without errors. Master the process of how to fix redirect chain errors during regular site audits to keep your technical foundation strong.
Setting Up Real-Time Monitoring Alerts
Fixing redirect loops once does not mean your site stays clean forever. Client edits, marketing updates, and automated plugin patches can easily recreate broken paths overnight. A single writer changing a permalink without checking existing rules brings back old chains instantly.
To stay ahead, developers set up automated monitoring instead of running manual scans every week. Configuring weekly cloud crawls catches broken paths before they impact search rankings. Many technical teams connect site auditors directly to Slack or Discord webhooks. The moment a crawl detects unexpected multi-hop redirects, the system sends an instant alert to the channel.
You should also monitor Google Search Console email notifications closely. Search Console flags sudden spikes in page indexing errors and redirect failures. Catching these alerts early allows you to address new technical seo redirect issues right away.
Adding an uptime monitor that checks critical conversion URLs every five minutes is another smart move. If a core landing page gets stuck in a loop, you know within minutes. Setting up automated notifications means you always know how to fix redirect chain problems early, protecting your organic traffic and keeping your server fast.
Q1: What creates a redirect chain in wordpress?
Changing permalinks multiple times usually causes this. Plugins auto-save old rules. Over time, these stacked rules build long redirect chains.
Q2: How do redirect chains affect my site speed?
Every jump triggers a brand-new HTTP request. Browsers must wait for each response. This extra latency visibly slows down page loads.
Q3: Can redirect chains waste my crawl budget?
Yes, search bots have strict crawl limits. Bots spend precious time following hops. They may leave before indexing your new content.
Q4: How do I test for hidden redirect paths?
Use a free online redirect chain checker tool. Desktop crawlers like Screaming Frog also work well. They show every hop and status code instantly.
Q5: What is the best way to apply a 301 redirect chain fix?
Always point the first URL straight to the final destination. Delete all middle jumps. Next, update your internal links directly inside the post.
Pingback: SEO Checklist for New Website: 7 Easy Steps to Rank in 2026